Google OAuth
SolidInvoice can use Google as an identity provider, letting users sign in or register with a Google account instead of an email and password. Users who already have a SolidInvoice account can also link it to Google from their profile page so they can sign in with either method afterwards.
The integration is optional. With no Google client configured, the application uses email/password authentication only.
What this enables
When the integration is configured, three new entry points appear in the UI:
- A
Login with Googlebutton on the login page. - A
Sign up with Googlebutton on the registration page (only when public registration is enabled — see Registration through Google). - A
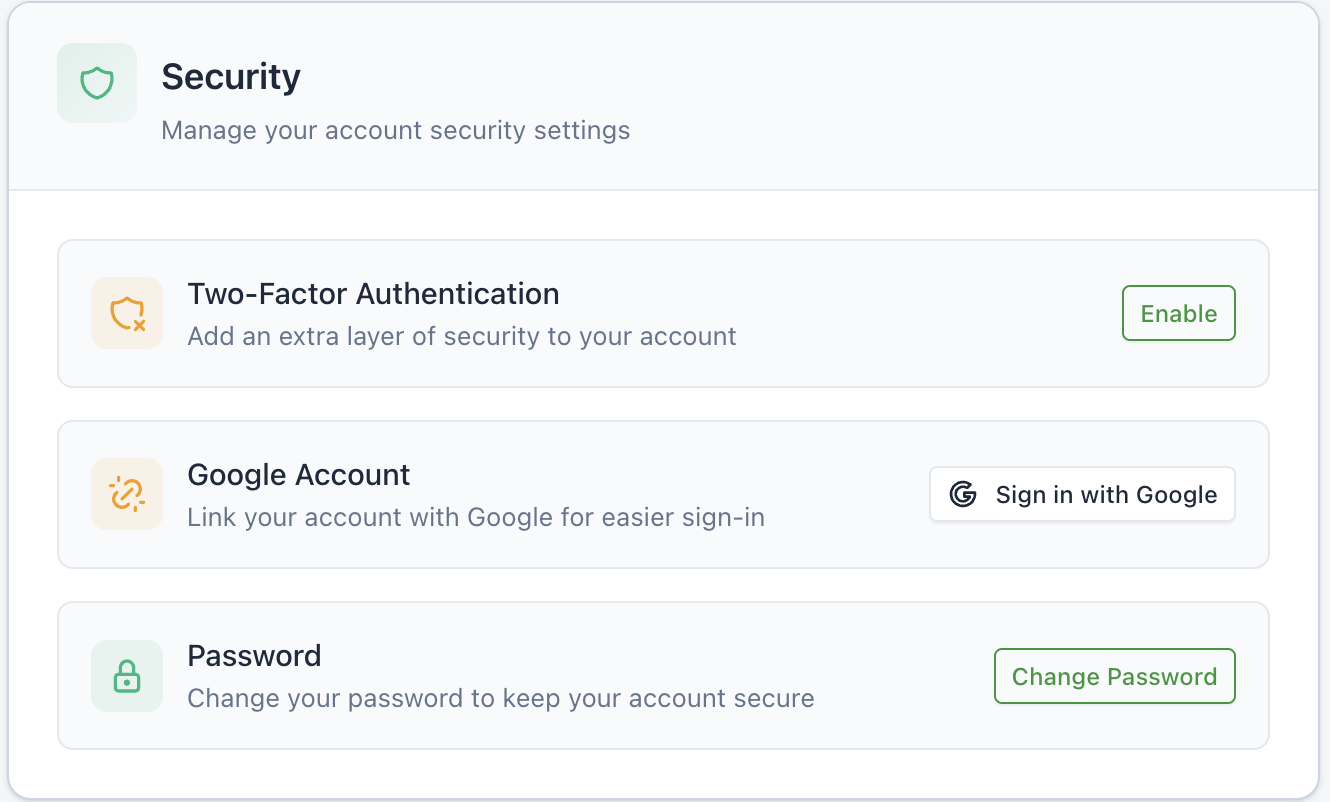
Google Accountrow in/profile→Security, where a signed-in user can link their existing account to a Google identity. Once linked, the row shows aLinkedbadge.
Behind the scenes, when a user completes the Google flow, SolidInvoice does the following in order:
- If a SolidInvoice user already has the returning Google ID, they are signed in as that user.
- Otherwise, if a SolidInvoice user has the same email address as the Google account, the Google ID is attached to that user and they are signed in.
- Otherwise, if a user is already signed in (the profile-page link flow), the Google ID is attached to the current user.
- Otherwise, if public registration is enabled, a new user is created using the email and verification status returned by Google.
- Otherwise, authentication is rejected with an error message on the login page.
Create a Google OAuth client
Before SolidInvoice can talk to Google, you need a Google OAuth 2.0 client.
-
Open the Google Cloud Console and select (or create) a project.
-
Go to
APIs & Services→Credentials. -
Configure the OAuth consent screen if you haven't already. Choose
Externalfor general use, fill in the app name, support email, and developer contact, and add theemailandprofilescopes. -
Click
Create Credentials→OAuth client ID. -
Choose
Web applicationas the application type and give it a name (e.g. SolidInvoice production). -
Under
Authorized redirect URIs, add the SolidInvoice OAuth check URL for your installation:https://your-solidinvoice-domain.example/oauth/check/googleThe path is always
/oauth/check/google. Add one entry per environment (production, staging, local development). -
Click
Createand copy the generatedClient IDandClient secret.
The redirect URI must match exactly — including the scheme (http/https), host, and trailing path. Mismatches show up as a redirect_uri_mismatch error from Google after the user clicks the sign-in button.
Configure SolidInvoice
Set two environment variables on the SolidInvoice instance, then restart the application:
| Variable | Description |
|---|---|
SOLIDINVOICE_OAUTH_CLIENT_GOOGLE_CLIENT_ID | The Client ID from the Google Cloud Console. |
SOLIDINVOICE_OAUTH_CLIENT_GOOGLE_CLIENT_SECRET | The Client secret from the Google Cloud Console. |
Both variables must be set for the integration to activate. Leaving either empty disables the Google buttons everywhere in the UI.
For Docker:
docker run \
  -e SOLIDINVOICE_OAUTH_CLIENT_GOOGLE_CLIENT_ID=... \
  -e SOLIDINVOICE_OAUTH_CLIENT_GOOGLE_CLIENT_SECRET=... \
  solidinvoice/solidinvoice
For the distribution package and source installs, add the values to .env at the root of the application:
SOLIDINVOICE_OAUTH_CLIENT_GOOGLE_CLIENT_ID=1234567890-abcdef.apps.googleusercontent.com
SOLIDINVOICE_OAUTH_CLIENT_GOOGLE_CLIENT_SECRET=GOCSPX-your-client-secret
If the Google buttons don't appear after setting the variables, clear the application cache: bin/console cache:clear.
Signing in with Google
On the login page, click Login with Google. The browser is redirected to Google, the user authorizes the SolidInvoice application, and Google redirects back to /oauth/check/google. SolidInvoice signs the user in (matching by Google ID first, then by email) and redirects to the company selector.
Already-existing accounts are matched on email automatically — a user who originally signed up with an email/password and later clicks Login with Google will end up signed into their existing account, with the Google ID stored for future logins.
Registration through Google
When public registration is enabled on your instance, the registration page shows a Sign up with Google button alongside the email/password form. Clicking it follows the same Google flow; if no SolidInvoice user matches the returning email, a new user is created with:
- The email address returned by Google.
- The Google-reported email verification status (skipping the SolidInvoice email verification step when Google has already verified the address).
- A randomly generated password that is never shown — the user can sign in only via Google until they set a password through the password reset flow.
If public registration is disabled, the Sign up with Google button is hidden, and Google sign-in is rejected for any email that doesn't already have a SolidInvoice account.
Linking an existing account
Users who already signed up with email/password can link their account to Google from the profile page. While signed in, navigate to /profile, scroll to the Security section, and click Sign in with Google on the Google Account row. After completing the Google flow, the row updates to show a Linked badge, and the user can sign in with either Google or their original password from then on.
A SolidInvoice account can be linked to one Google account at a time. If a user wants to switch the linked Google identity, they need to unlink the current one through database access — there is currently no in-app unlink button.
Troubleshooting
redirect_uri_mismatch from Google
The redirect URI configured in the Google Cloud Console does not exactly match the URL SolidInvoice is calling back on. Compare scheme, host, and path — the path must be /oauth/check/google, and the scheme and host must match the public URL of your installation.
Google buttons don't appear on the login or registration page
Both SOLIDINVOICE_OAUTH_CLIENT_GOOGLE_CLIENT_ID and SOLIDINVOICE_OAUTH_CLIENT_GOOGLE_CLIENT_SECRET must be set and non-empty. After changing either variable, clear the application cache with bin/console cache:clear and reload the page.
Authentication is rejected after the Google flow
Public registration is disabled and the Google account's email is not associated with an existing SolidInvoice user. Either enable registration so the user can be created automatically, or have an admin create the user first with the matching email address.